Uncategorized

Happy Easter … mostly through eating…

Hello, all! I hope you all had a blessed and wonderful Easter Sunday. We did our usual visit to my parents\’ church for their Easter cantata, which becomes more charming (and powerful) each year as the entire church continues to age (and, thus, shrink as well **sad sigh**). The amazing fortitude that this little band of baptists possess is inspiring. Through my parents, I have been a part of this church for about 32 years, and how this aging and now-dwindling population continues to keep absolutely everything going is nothing short of mind-blowing — from maintaining the enormous (and now largely empty) building and grounds to keeping every single outreach program going, including a bus that picks up any person needing a ride to and from church. Following the lovely Easter program given by these saintly people, we had a very early breakfast with my own aging parents (my dad is turning 88 this year!) and then said our goodbyes to them for the day, heading home for more Eastering.

At home, I am responsible each Easter to serve dinner to my husband\’s family and our kids (whichever of them are available!). For this task, I start cleaning and then cooking a few days prior to this, and any, holiday. And now, with my new eating habits, I have been learning (starting with last Thanksgiving) to make things a little differently, while still making them delicious. I figure everyone can eat a little better; why do I have to be the only one? Aren\’t I sort of responsible for my family\’s well being?! While my menu is not perfect (I had a stomach ache for a few hours after eating the frosting on the carrot cake, but it was worth it for one — or two — servings!)

Here are some pics and recipes/information to follow!

On this year\’s menu: 

Gluten Free/Soy Free Carrot Cake from Divas Can Cook, new recipe to me and WOW! Not necessarily dairy free, but can be made that way. See recipe. (I just noticed I accidentally put dessert first. Oh, well.)
Gluten/Dairy/Soy Free Scalloped Potatoes from Faithfully Gluten Free, new also, and WOW WOW! This one is also very low in fat — and it was such a hit that my family demands it be put in regular dinner rotation. I did have to cook it longer than directed, like 15 more minutes in the oven and I covered it as the potatoes were not getting cooked well enough at about half-way through. Next time, I\’d cover it from the get-go, uncovering it for the last 15 minutes of baking.
Gluten/Dairy/soy free carrot/jicama/parsley/golden raisins salad using the base for Whole30 Carrot and Jicama Remoulade, page 138 in the Whole30 cookbook. That recipe is not online for free, but includes making your own soy free mayonnaise, which I keep on hand, and adding dijon mustard and lemon juice. As you see, I put my personal ingredients here in my recipe \”title.\” Plus, I added 1 tablespoon of sugar to mine. BTW, if you have this cookbook, make ALL the recipes on this page as a meal — it\’s really good. And don\’t be afraid to play!! TWEAK those ingredients! I make my salad more than double, using a zillion carrots (ok, like 8) and a large jicama, but I don\’t exactly double the dressing. It just doesn\’t need it.
Costco Ham. No romance here, just made it straight up off the package, because people love it. Ok, and expect it. 🙂
Roasted Asparagus I thought I had my own recipe, but turns out that Ina Garten makes hers just like I do. I am flattered and defer to her. Get the recipe here.
Deviled Eggs, my own recipe. I don\’t eat them as they are not \”safe,\” but I will share the recipe: hard boil about 12 eggs, cool and peel. Halve the eggs, smashing up the yolks well in a good-sized bowl. Whisk in about 3/4 cups mayo and 1 tsp or so of dijon mustard. If you can\’t whisk it after a few go-rounds, add more mayo until you can — just watch not to make it too thin. Once you are happy with the consistency, stir in: 6 sliced green onions, 6 slices chopped cooked/cooled thick bacon, white pepper to taste and about 1.5 tablespoons of Ranch dressing mix (powder). I sometimes get crazy and add 1/4 tsp of onion powder AND 1/4 tsp garlic powder as well. A few finely chopped dill pickles and/or olives don\’t suck in this recipe, either. Once done with all your own personal experimentation, generously sprinkle the whole platter with paprika and freshly ground black pepper.  And what the heck, toss more green onions on the top. It\’s so pretty!
White Nut Bread, from Betty Crock\’s New Picture Cook from 1961. NOT GF/DF. But it\’s so lovely, I wanted to make it for everyone. It feels just — Eastery. Since there is no recipe online close to this, I am taking a chance and sharing mine. I love this loaf. It is huge!! Bake for the time it says exactly and don\’t freak out when it looks like it\’s getting too tall. Mine has never run over the sides of the glass pan I use:

After Dinner, of course, and Easter Egg hunt! Since it was raining outside, we did ours for Amy Rose indoors!!

Daddy made it pretty challenging. We are still findings eggs…

Uncategorized

Pelle Test Knit

Another test knit for Gabrielle Danskknit! I came in dead last of all the test knitters, but I finally finished this lovely little raglan sweater with interesting — and simple — cables down the sides is called \”Pelle.\” You can buy the pattern here. Sizes run from newborn to adult large — and I know we all love that kind of range. It makes patterns so much more useful.

My Pelle sweater is made from a yarn that has been in my stash for a while. It is a lovely, squishy-soft aran weight yarn from Classic Elite called \”Majestic Tweed.\”  It is a wool, silk and angora blend, and, while it is discontinued, there are others like mine. Doing a quick bit of research, I found that Noro made some similar yarns such as \”Retro,\” and \”Vintage,\” and there is yet another yarn called \”Juno\” by The Great Adirondack Yarn Company  Look around your stash! You might find one of these. Or, do your own thing! If you look at the list of Pelle projects on Ravelry, you\’ll find loads more ideas.

Using my yarn, my size large sweater required 1,174 yards/584 grams of yarn to complete. I added an inch of simple short rows about 3 inches into the raglan shoulder section to raise the back a bit, as I feel like that always improves the fit for me. I made the arms longer as I just have weirdly longer arms, and I set out to make the sweater several inches shorter than written in the pattern. But,as I started this project in September of last year, only finishing it up this past month after my health finally improved (You can see the blog post on that here), my sweater is now about 2 or 3 sizes too big. I originally wanted it to be a high hip-length sweater, for example, and, as you can see, it now is nearly a tunic! I don\’t plan to frog it or change it now! It is very cozy and I am just so happy to be able to finish it and wear it. To me, it is a symbol for a brighter future and how much better I am doing, now that I can resume my favorite pastime: knitting!

On a recent weekend trip with my husband to Astoria, Oregon (one of my favorite place in the whole world), I brought the sweater. It kept me warm and happy in the chilling and surprising wind that can suddenly blast off the Columbia River (The mighty Columbia never produces a gentle \”breeze.\”) My husband was kind enough to take photos of me in the sweater in front of the Flavel House Museum, and I love how the green of the sweater plays with the green of the grass on the grounds … of the Flavel House Museum (…in the house that Jack built… sorry … had to make the joke…).

The back looks sort of sloppy now, but the short rows are
still there!!

I have a lot of knitted lovelies in the works, along with some sewing, too! Stay tuned for more knitterly eye candy and fun!

If you like this sweater, you can find more from Gabrielle Danskknit on Ravelry here, or on Instagram here!

Uncategorized

Finally Finished!

Forever. It actually took more like 2.5 years to complete my husband\’s lap blanket — but it felt like an eternity.

I began this \”lap\” blanket as a way to use up a bunch of Red Heart yarn I had taking up space in my stash. After the striped part (now the center) was about halfway done, my husband \”tried on\” the blanket. At that point, it only barely covered half of his long legs. \”I want it to cover all of me when I am cozy on the couch and watching a show.\” That had been the point of the blanket. I hadn\’t thought much about it — I just assumed putting a blanket on your legs was enough coverage. Now we were going full cozy.

In our house, \”cozy\” is a big deal. Whenever considering anything, from wall paint to picture frames or furniture (and no matter how good of a deal it may be), when to watch what movies or shows, which activities to do or even who visits our house: If the thing in question is not cozy, the thing is OUT.  OUT I tell you!

The blanket had to be cozy. Or bust. He was right, of course. Snuggling up under your very own personal blanket to watch a movie at night while eating popcorn, and then maybe even snoozing underneath that blanket later? Lap blankets can\’t provide those services. No way.

So I set out on a longer blanket quest. One that would reach from shoulder to foot on a 6\’1\” man. (And just reach — after all, no need to overdo it when there are so many other UFOs laying around!)

As I crocheted on and on … and on, I noticed that the blanket began to look weirdly narrow. This meant that longer was not good enough — or cozy enough, which is the same thing — so wider it had to go. I added on and on to the sides and ends until it was just right.

Then there was weaving in all those ends…

It took an episode and a half of the Hallmark Channel\’s \”When Calls the Heart\” to get through those ends. It may have taken a shorter time had I done the weaving in without the TV on, but I needed cozy too! And you have to look up when Jack is going to do something mischievous to Elizabeth, or when Rosemary is getting totally on your nerves — again! (What about that theater?! No spoilers!! We are binge watching through season 2 on Netflix!! Yes, my husband, 9-year-old daughter and I — are ALL watching!)

Now, I should confess: I am not much of a crocheter. Suffice it to say that this blanket is an extension of my Christmas washcloth/dishcloth making. This one just happens to be really big. And I wanted to add dimension, so I used Erika Knight\’s pattern Stripy Throw from Simple Crochet. It took me half of the blanket (and several episodes of Dr. Who, not binge-watched, so a really long time) to realize that I had been doing the stitch pattern totally wrong, but I left it as it was — to give it character, of course. If you look closely, you may notice the differences at the ends of the striped section. In addition, It may not be square or perfect but it is cozy.

And that\’s all he wanted.

Uncategorized

I’m Back! I may not be better than ever, but I think I’m ok, now.

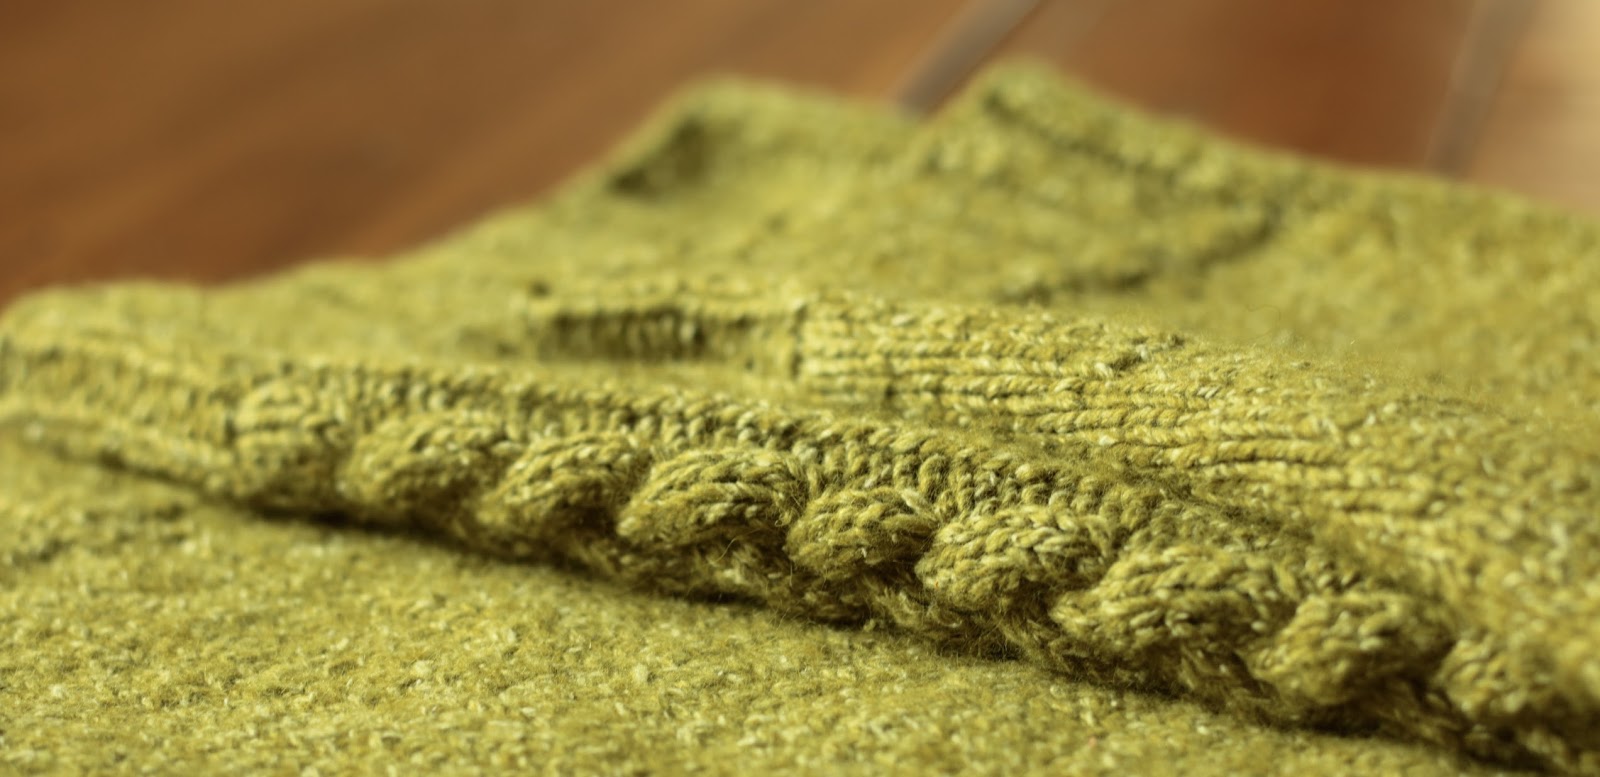
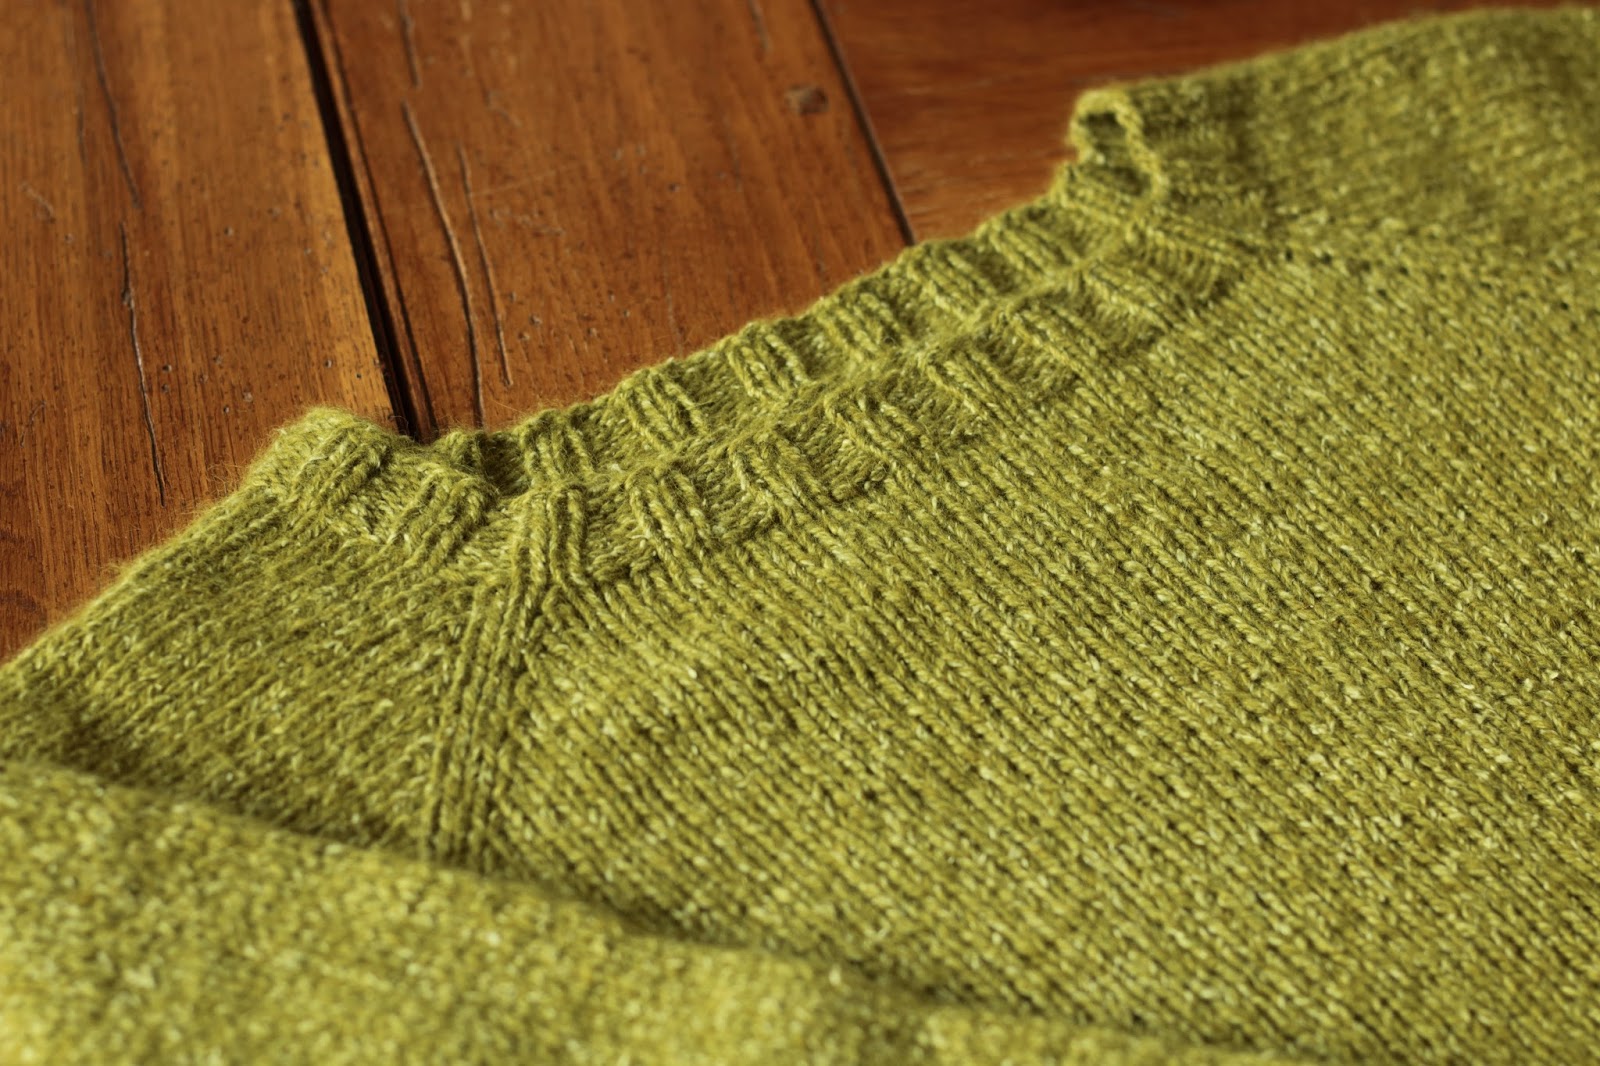
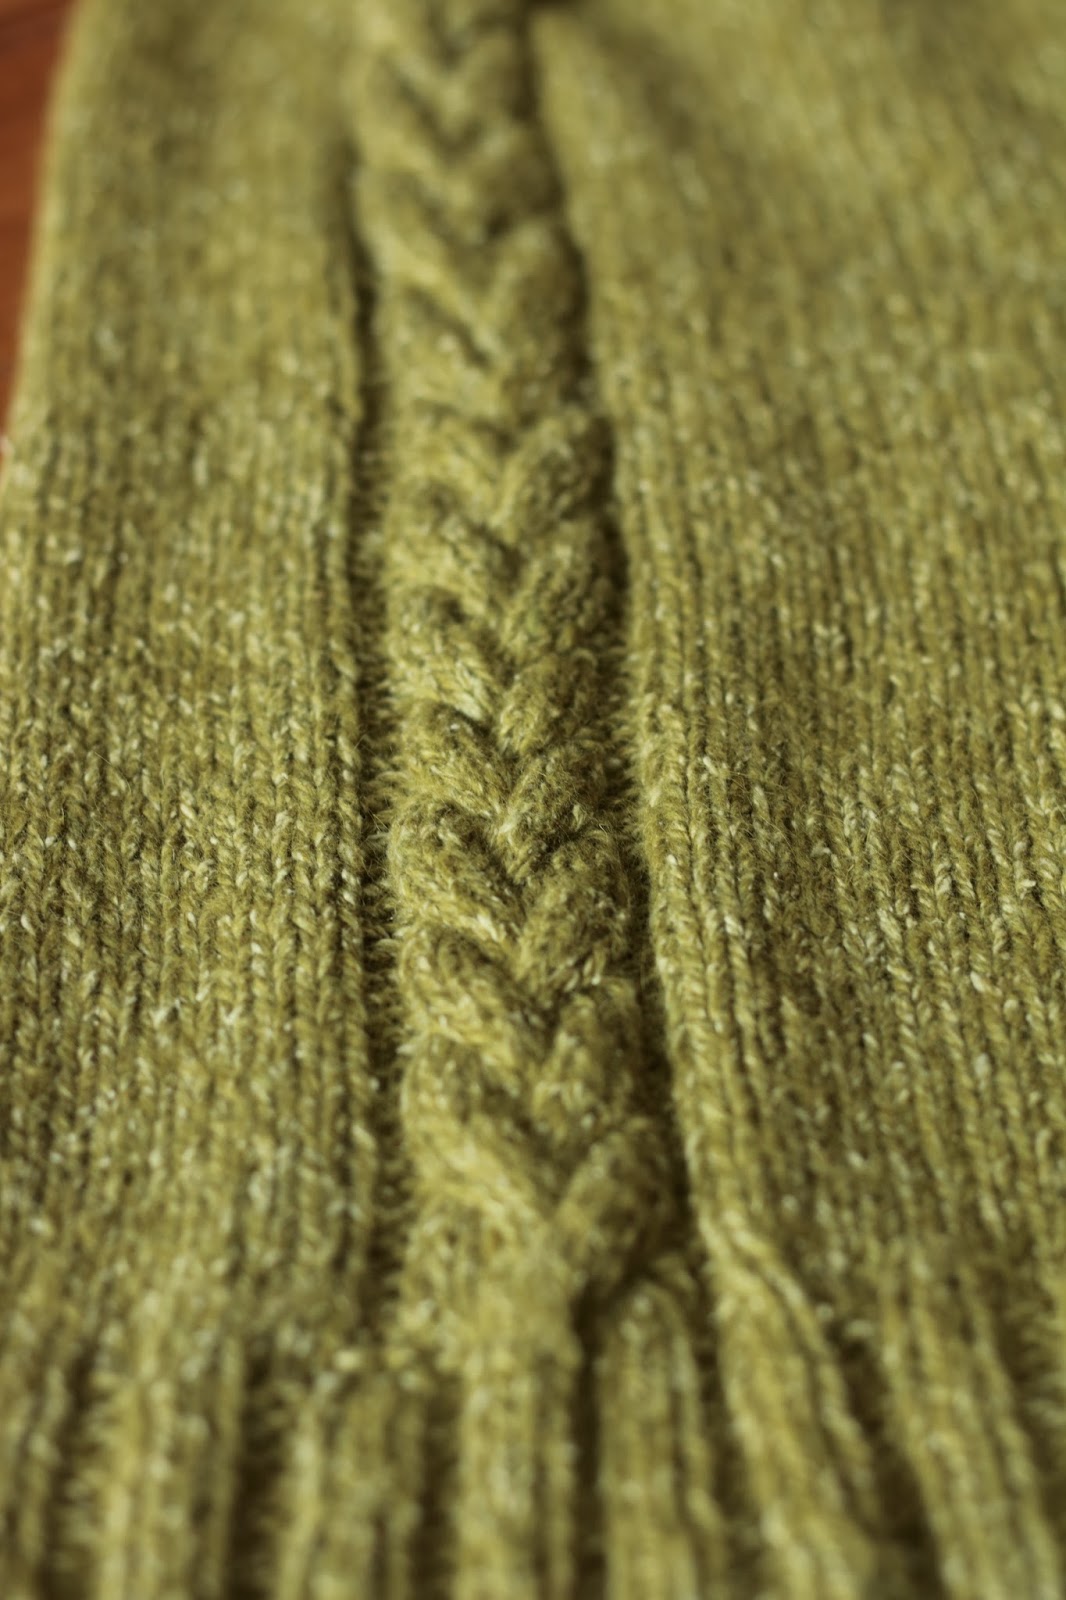
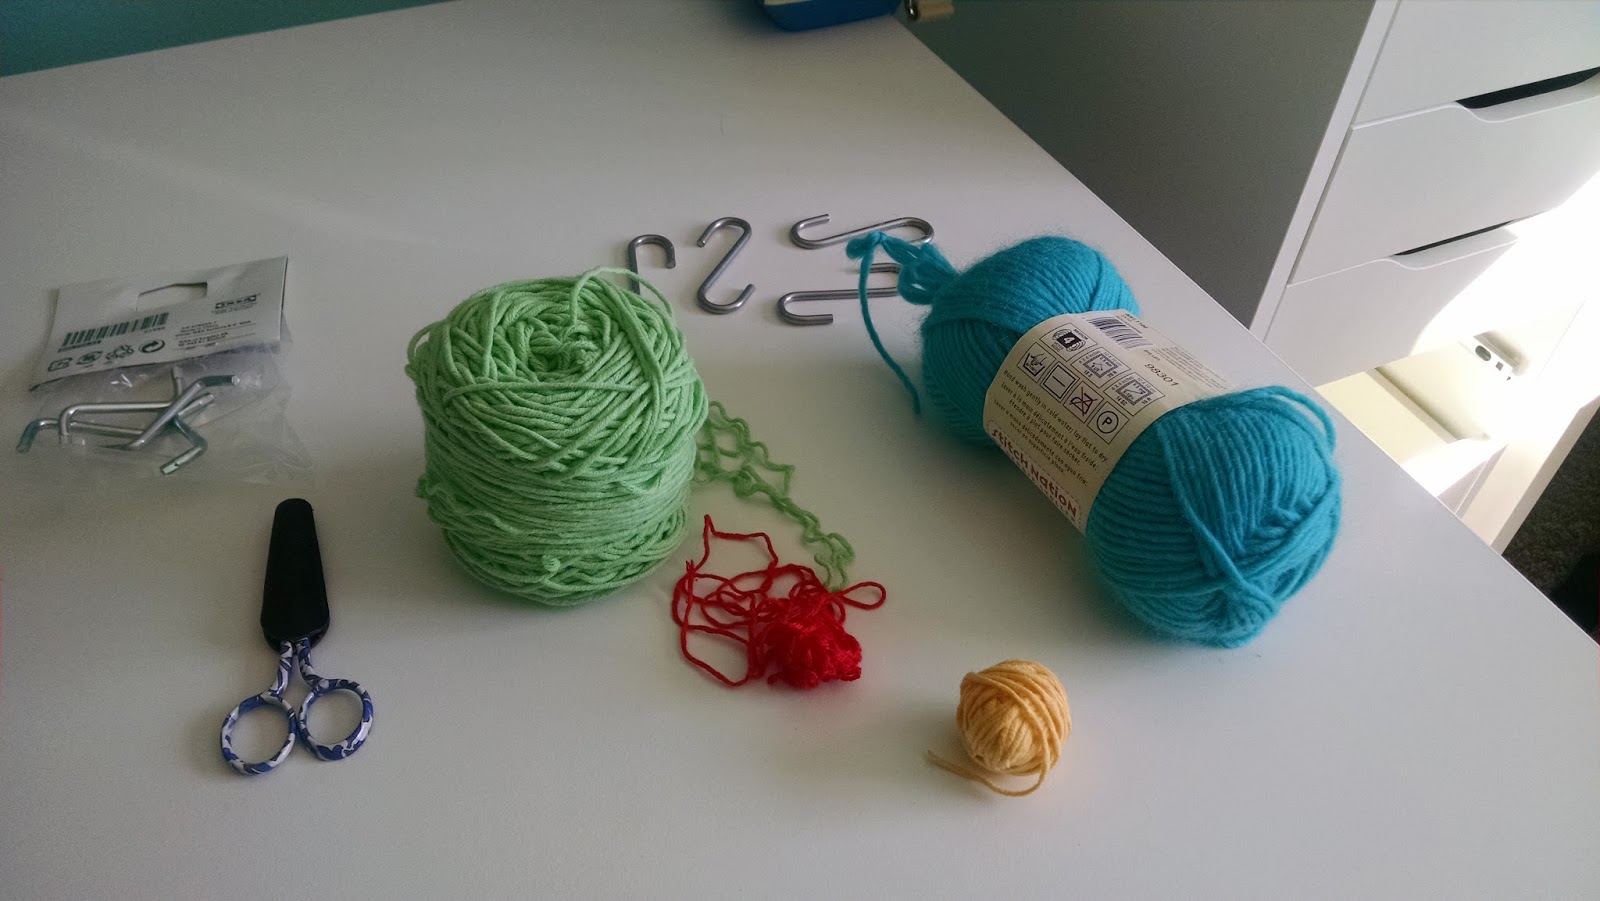
Astoria last weekend! I actually recently was
able to complete a sweater for myself! Oh,
do I adore knitting!

I have been sick for about 8 or 9 years — and thinking about it after the fact, maybe a lot longer. And here is something I have learned in that time: The demons of chronic illness and pain, no matter how hard you try to ignore them or outrun them, will eventually hunt you down and demand that you deal with them. It is only a matter of time.

Believing that other people may be able to relate to my story, I am going to share it here with you all in shortened form. It isn\’t dramatic, but for me and others like me, it is instead frustrating and often drawn out far too long.
About 9 years ago, I started getting what I call \”little fevers.\” They never went anywhere, never would develop into full-blown flu or anything else. I just felt bad. After a year of missing random days of work here and there, I went to the doctor for a pain in my side. That same day, I had a CT scan and was given an immediate referral to a surgeon, who said my gallbladder was very inflamed and had large stones; it had to come out the very next day. Once it was out, I had relief for about 18 months. But the relief ended. My stomach hurt — all the time. And I was living with persistent nausea and IBS.
At that point, I slowly — very slowly — began walking down a path of confusing nutritional problems, starting out with learning about gluten intolerance through my regular family doctor. At his suggestion, I strictly eliminated gluten from my diet for 6 weeks and got so much relief that I stayed with it. After a while I was not quite so strict with that elimination and, alas, that initial relief also did not last. But I kept thinking it would just go away; after all, I was too busy to deal with this. I had family demands, along with church, kids\’ school, volunteer and work obligations! Who has time to be sick?? And anyway, other people have such bigger problems than mine. Mine was really more of a distraction than an illness. Such were my rationalizations.
Fast forward a few years. Growing a bit more weary and seeking more answers, I started seeing a GI doc, and she was very helpful in many ways. She had me do \”the gluten challenge\” to look for celiac disease. This challenge includes eating a LOT of gluten for several weeks leading up to an endoscopy, where they look for intestinal damage from the gluten you have been eating. While I was not diagnosed with celiac disease, I did have a fire-engine red stomach after eating all the gluten, which the GI doc told me to stop eating altogether, as though I do have celiac. She also diagnosed me with Barrett\’s Esophagus, which is damage to the lining of the esophagus from long-term acid reflux. 
I wondered aloud about this acid reflux to my doctor, as I had never had acid reflux symptoms before — except after my gallbladder was removed. Without my gallbladder, I had begun burping all the time after eating or drinking anything, even water. I mentioned to them that I\’d read about bile reflux, too. Could that be a problem, since I had no gallbladder? What should I do? I started asking nutrition questions. Surely, there could be an answer using or eliminating foods. But my GI doc didn\’t seem to know what to do with nutrition questions. They wanted me to take Prilosec for life. I persisted on the nutrition idea and they gave me a copy of The Low FODMAP Diet and said, \”You could try this.\” 
No go. The diet nothing for me. So I struggled along for another couple of years with pain, nausea and IBS symptoms. And just to top it all off, I became pre-diabetic. What the crap!? Was this going to be my life?!
Somewhere amidst the years of digestive distress, I had also been diagnosed with degenerative disc disease in my neck, bone spurs and all. No nerve damage (yet), just achingly painful. A combination of factors played into this:  I was previously rear-ended just as college was ending, in 2008 or so; and I had been a dental hygienist for a handful of years at the time of diagnosis. My job (along with all dental jobs, really) is well-known for trashing people\’s upper backs and necks. Often, it is just a matter of time before the pain is too much; people often quit. 
I had been through 2 chiropractors, and in the spring of 2017 was starting with a third. This time, I thought, I should try a chiropractor who provided muscle imbalance training/physical therapy. So, I selected an office that showed promise on that front. I won\’t tell that whole story, but suffice it to say that while they were much more to my liking than the other chiropractic offices I had tried, I had to ask earnestly for home exercises. There response to me was surprise, \”No one ever wants them or does them,\” they said with raised eyebrows. They seemed shocked that I would try to help myself. (I say they should educate people more on that front, but I digress.)
With still only limited success with the third chiropractor, I had had enough. I could no longer even do the things I loved. Working in the yard all day was too much. I was lucky to get a couple of hours before the pain was too much. Knitting? That posture was too close to my work posture — head down — and was exacerbating my neck pain. I had to choose work over knitting. I had all but stopped. That made me really sad. And food! Not only have I always loved to prepare and eat it myself, but I have also always been the \”family caterer.\” It is me who brings the greater family together at holidays and creates the warm, happy atmosphere that so often centers around good food. Now, food felt like an enemy. So my health, hobbies and even my enjoyment of family traditions seemed too all be slipping away. 
Even then, as I was really beginning to feel beaten down by my own body and circumstances, a secret goal was forming in my mind at that time: Get off the chiropractor, and figure out my digestive distress for myself. Both things, once and for all, by the end of the year.
In September of 2017, I made a choice. I knew I had to act drastically to get results. I also knew I had been avoiding action for what seemed like an eternity. My combination of inaction, confusion and frustration was sort of crippling, really. In fact, I didn\’t even know if I had enough energy left in me to try anymore. It may have been unreasonable, but that\’s where I was.

I tried to focus, to simplify. My goals boiled down to these two things:
1. Get strong enough to hold my body in position to do my job 4 days a week at 8 hours a day.
2. Figure out which foods may have been contributing to my problems and STOP EATING THEM!

First, I joined a gym. In fact, I had been a group fitness instructor — ACE and AFAA certified — for 12 years before pursuing dentistry. In addition, I was a human biology/physiology major in college. So to be honest, my shame was strong on the fitness front. I had not been to a gym in 12 years, and I knew better. I knew I needed strength to commit to a dental hygiene profession. And I had not. I ate my pride and started at the gym, feeling a bit fragile and knowing I\’d have to be careful and mentally prepared for that road to be long and hard.
Around that same time, I heard about the Whole30 diet from two of my patients at work. They had felt much better after the strict 30-day elimination diet. What about that? I thought, It sounds like elimination of inflammatory foods. I think I could use that. I bought the book and the cook book, recruited my husband to support me and just went for it. I felt all-in. The Halloween of 2017 was the first Halloween in my entire life that I did not eat a single piece of candy. 
By the time I saw my GI doctor for a 3-month follow up after my latest endoscopy, I had lost 7

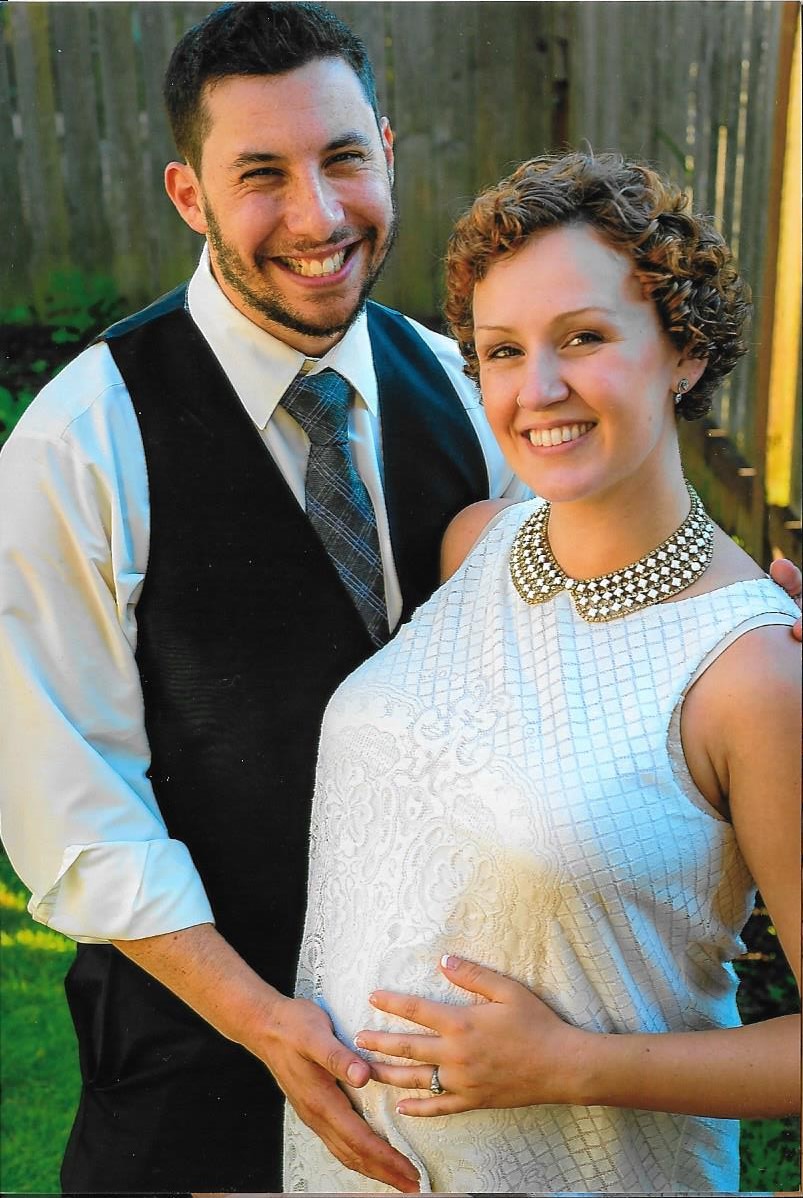
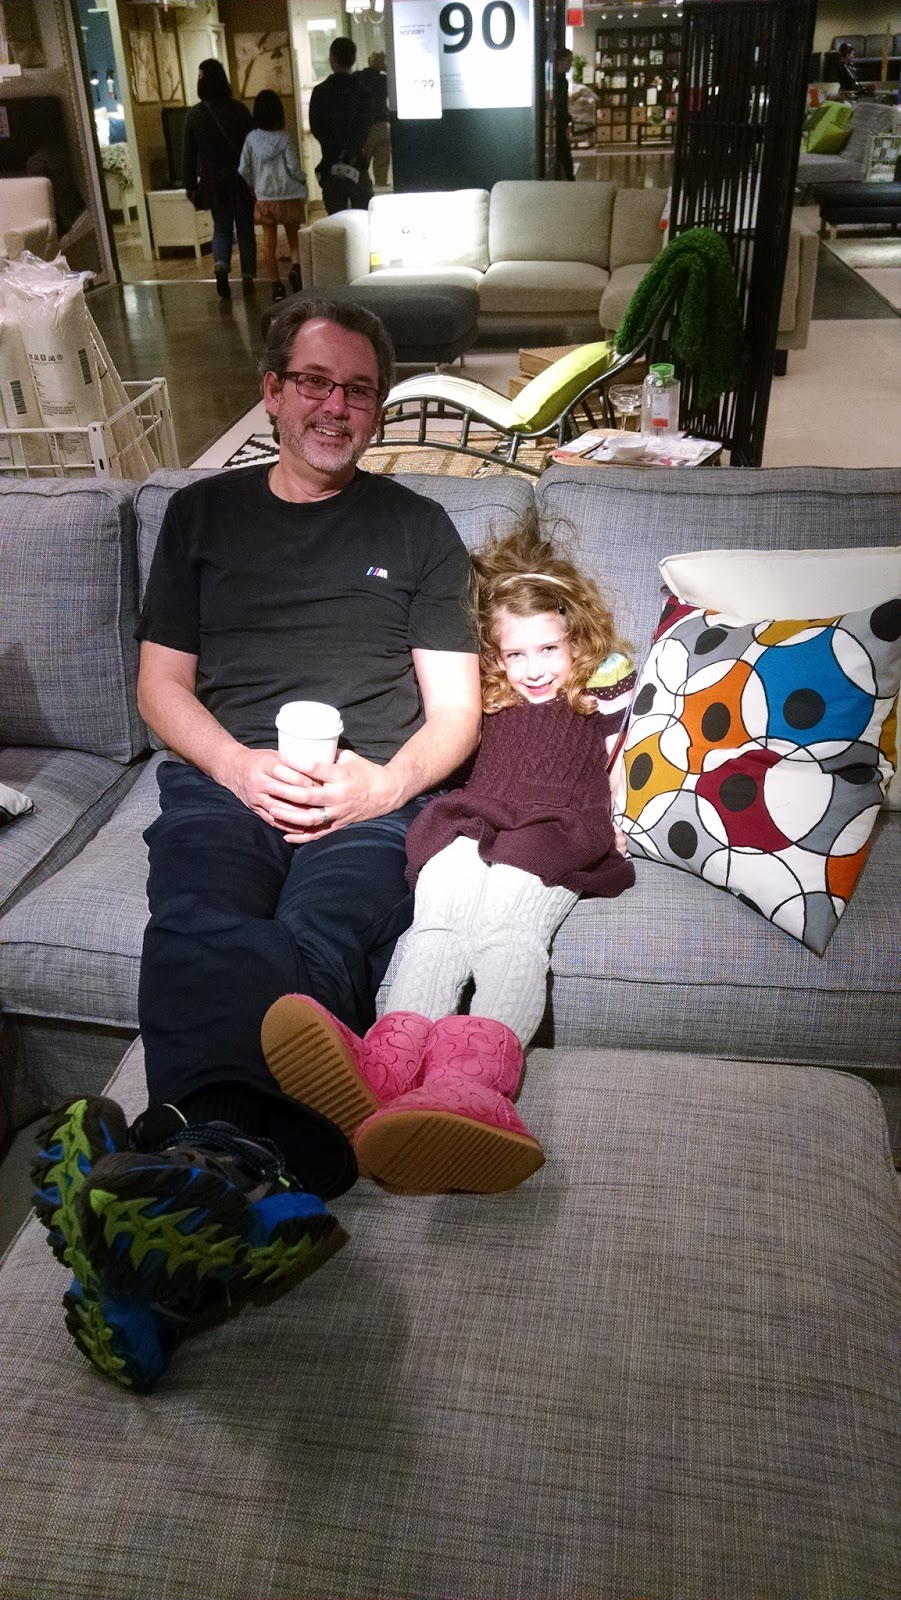
My hubby and I at a LaSalle High School
fundraiser in January and me in new jeans! I can\’t
remember the last time I actually
enjoyed shopping for them!

pounds and was feeling digestively wonderful. She was pleased. She told me, \”We\’ve seen people have a lot of success on these anti-inflammatory diets.\” I did not ask why she had never mentioned that before, or why they had not simply referred me to a dietician. She did tell me she was glad I was trying things on my own, and offered some helpful advice to start and maintain a probiotic. Easy enough, I thought, I added it in. 

For me, the end of all of this food sleuthing meant permanently eliminating gluten, soy and dairy (which, to be fair, my GI doc had mentioned in passing once that I should consider that dairy might be another intolerance, as those who cannot have gluten commonly cannot have dairy either). I now eat lots of vegetables, lean meats and legumes, I continue to have to make my own mayonnaise and salad dressings (most of those two commercial items have soybean oil) and I can still have coffee and some gluten-free treats. I limit my sugar intake (to help arthritic inflammation) and I do eat fruit, but I don\’t love fruit so I make smoothies with frozen bananas, hemp hearts, almond butter and almond milk. Oh! And cinnamon.

I have maintained an exercise regimen of cardio (I started out with treadmill walking, and now, after gaining some strength, toggle between \”HIIT\” treadmill sprinting and outdoor walking/running), weights and core strength training, which includes yoga at home. (I love Yoga with Adriene!) I don\’t rule out needing my chiropractor in the future, but I hope I will not be needing to go in 3 times a week ever again. That was tedious and a lot more expensive than the gym!

Now, 7 months later, I have incidentally also lost nearly 25 pounds — losing weight was not specifically a goal, but a very welcome \”side effect\” of healthy digestion combined with some moderate exercise. It feels good to keep having to clean out the closet, taking more and more clothes to The Goodwill because they are too big. And a couple of weeks ago, I even put on all the pants I had been saving, some of which I purchased at 33 years old (16 years ago)! I had forgotten what my body felt like before having our last child (number 6 in our family, and my 5th biological child), but I am regaining that feeling now as I approach 50 years old. My energy is much improved and I am back to enjoying a lot of fun things.

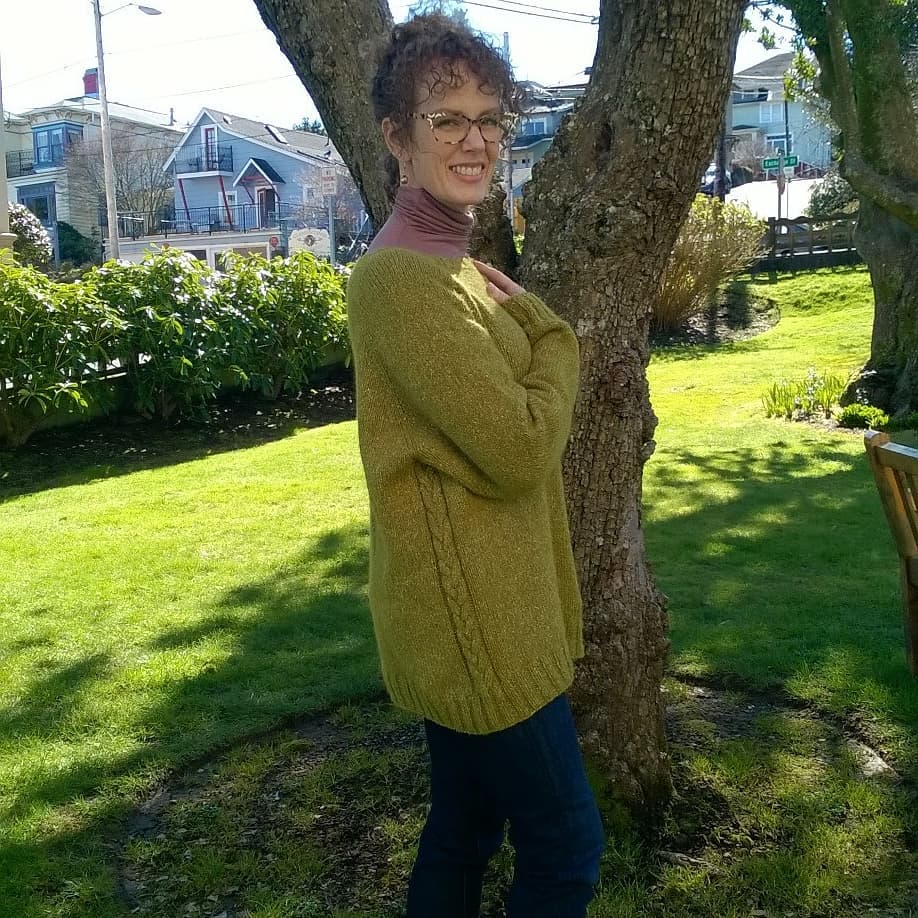
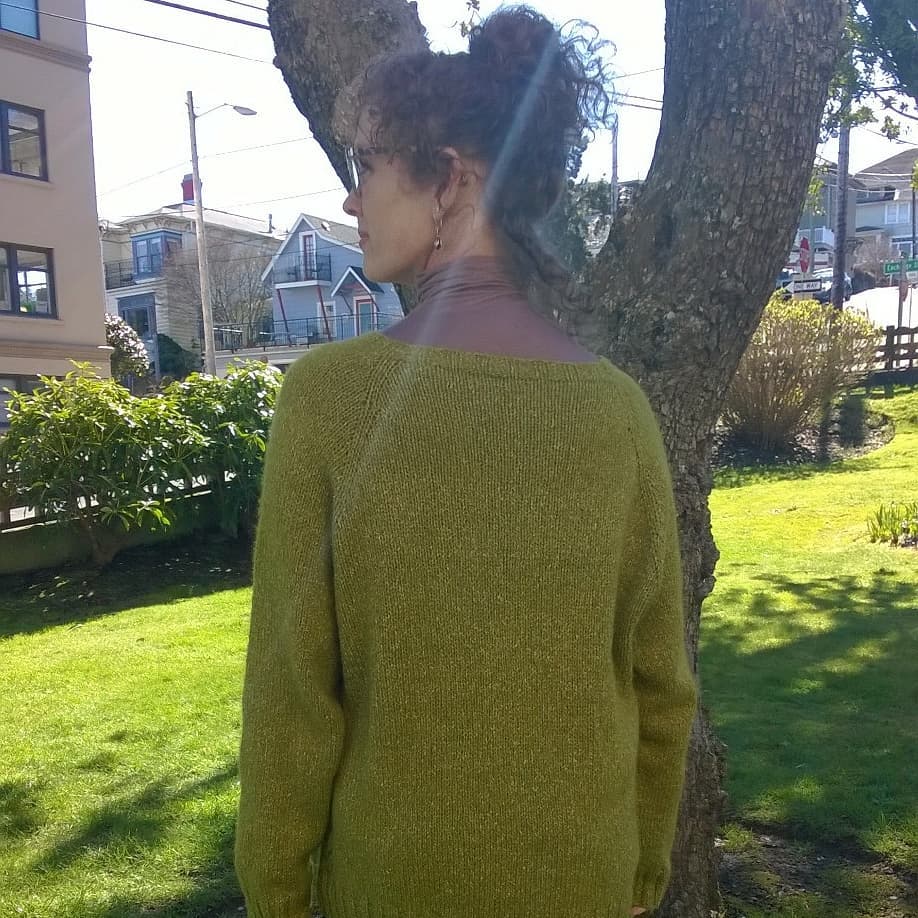
AND, I can knit again and work, too. (NEWSFLASH: GET READY FOR A LOT OF KNITTING, SEWING, GARDENING AND ALL AROUND CRAFTINESS!!) No, things are not totally perfect, and my neck still gives me a little trouble but I hope as I continue to get stronger — and maintain much better posture — that it will bother me less and less. Even if it stays the same as now, I don\’t even care anymore! What I have now is so much better than it was that I\’ll take where I am now, and gladly. Here are a couple of \”before and after\” pics, just for fun:

First size medium shirt I\’ve had in years!
Silly science, of course!
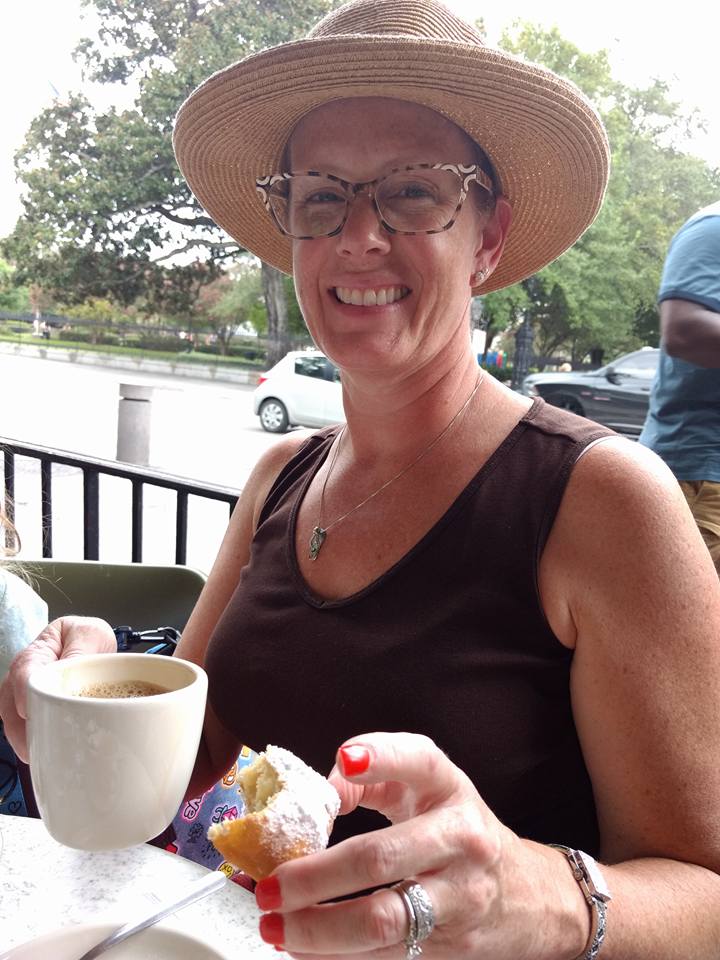
New Orleans, last August.
Who wouldn\’t eat Beignets at Cafe du Monde?! Here
you can see my \”sick\” face, which was often puffy.
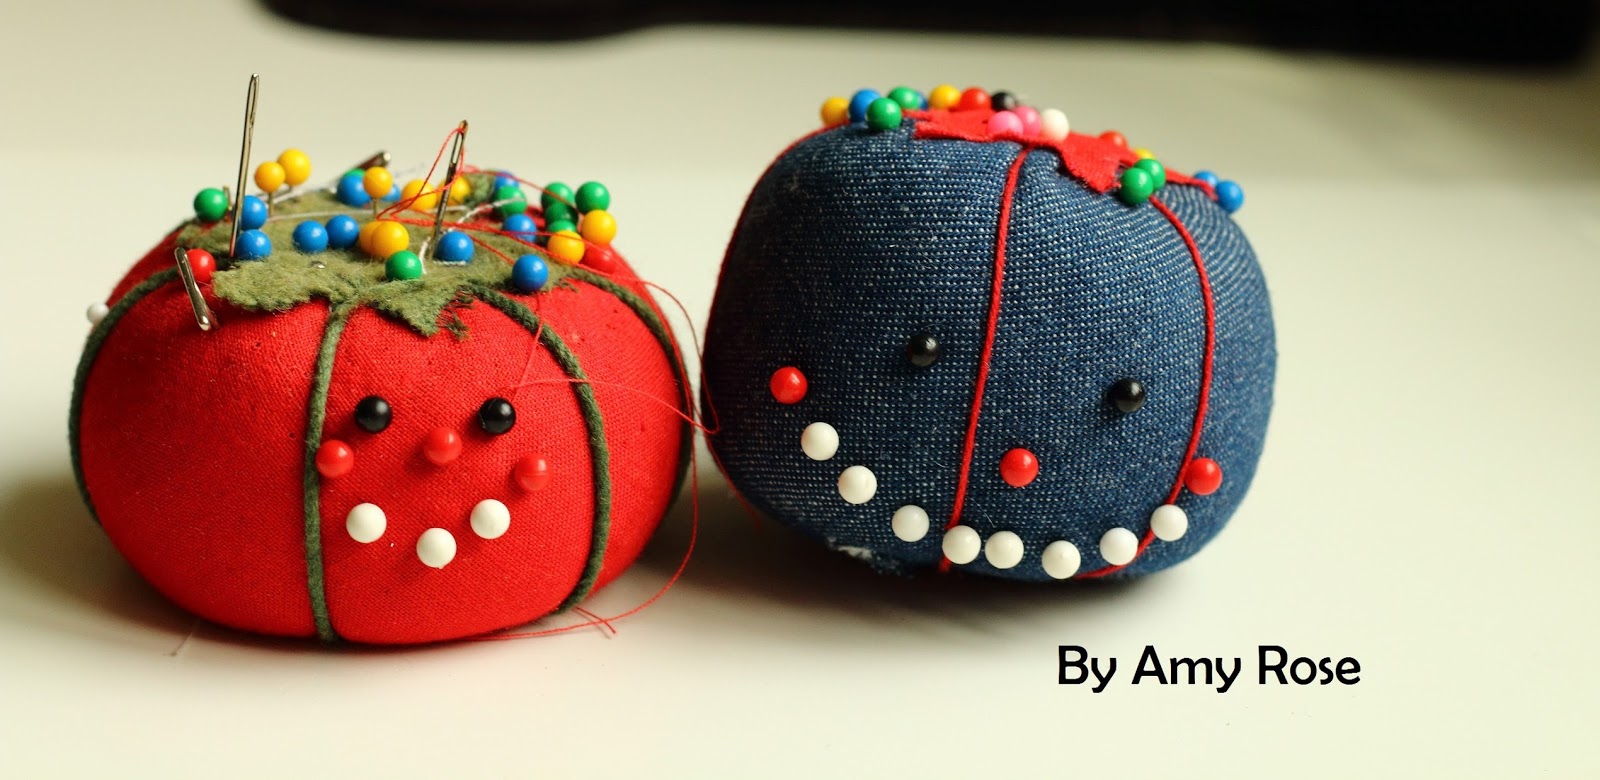
New Orleans last August, posing with Amy Rose and Annie.
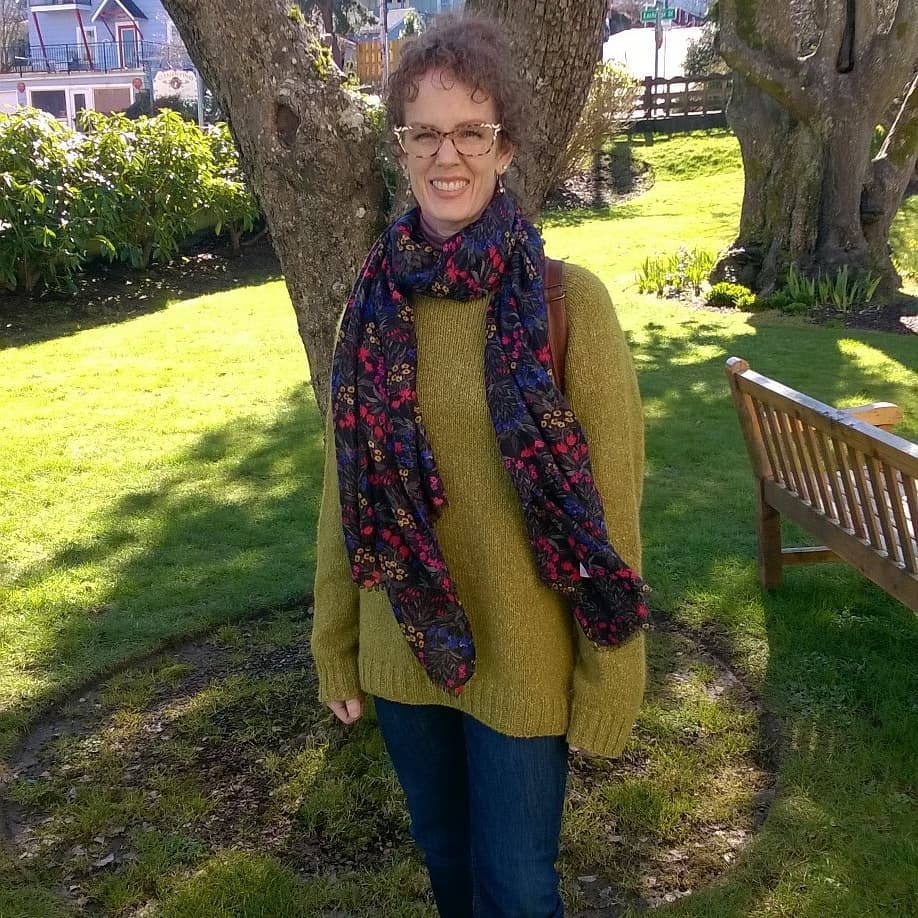
Rose City Yarn Crawl, PDX two weeks ago! Feeling much healthier. 
For anyone in my shoes and/or wanting to get healthier, please please please check with your doctor before embarking on any diet or exercise program! My diabetes educator turned out to be a great help through my family physicians office, for example. And get checked out when and if you feel sick, even if you don\’t think \”it\’s anything,\”you never know. Be safe! 


Uncategorized

Coffee Lament: A Useless Perspective on Sinus Infections

My coffee may as well be made of yarn, like my
double knit pot holder pictured here.

I can taste my coffee. I think. Let me take another sip…no, well, not sure. It has been so long, now, since I have had the real, deep pleasure of tasting my coffee that I am starting to settle into a new way of enjoying it: memory and fantasy.

I have, like so many others in my local area, had the misfortune to contract the worst cold/sinus infection/bronchitis in ages. I work in healthcare; I wash my hands constantly; I change out of my scrubs after working with the public all day; I wipe down my work areas with hospital grade disinfectant that would take out even the most stubborn tuberculosis spores. And I still got it. The Cold. And I don\’t mind so much, in a way: the painful, constant coughing; the headache from it; the annoying-as-crap inability to get out of bed; the body aches that constantly scream for a heating pad. But it took away my coffee. And that is unacceptable.

After about a week of no taste/no smell, I had the most vivid dream. It was a cup of coffee. The best one I\’d ever had. It was the sort of cup that made me question if this cup was some special recipe I had accidentally concocted. It made me wonder if I should start measuring the grounds in grams or use a special sort of water. In the dream, I decided that it didn\’t matter how the coffee came into being, it just was. And it made The Cold just a little bit more bearable — for a while.

That memory of the dream fantasy — the perfect heat of the drink, the perfect sweetness, the perfect tackiness on the tongue, the perfect creamy texture — is fading now. It has been another week. And I sit here facing a cup that I cannot detect. It is like having face blindness, but to food. I look at the stranger on my desk and wonder, when?? When will we get to know each other again?

If we were discussing my romantic endeavors, you would all think me the most pathetic person in the world; living in a memory of a fantasy! How sad! I guess I can just be glad that, in this case, each day brings a tiny bit back, though often it is almost imperceptable. I think I can tell the sweetness. I think I can smell it if I just bring it really close to my nose. I think that drink was a better one than the last. In time, it will all come. Not like princes, who sometimes don\’t.

Yes, eventually all will be right with the world. And we always have knitting.

Another test knit for Gabrielle Danskknit! I bet you can guess what
this is!
Uncategorized

#yarnlovechallenge!

If you haven\’t caught on to this, you should! Knitters, crocheters, weavers, spinners, dyers alike; this is for you! Instagram is hosting this cute event! With fun prompts like \”travel projects\” and \”oldest stash,\” people are madly posting their photos and their stories to Instagram, revealing their knitting lives. (Check out Mary Jane Mucklestone\’s crafting space! To die for!)

I am surprised and delighted at what others share. Very sweet, hilarious and sometimes profound.

Check it out! Find me on Instagram here. And post your photos with #yarnlovechallenge. There is over half a month left! Want more yarn love? There is a Ravelry group for this, too!

Mary Jane Mucklestone\’s crafting space. Looks like a dream to me!
My 7-year-old\’s idea of \”tools\” day! Thanks, Amy Rose!
(\”Mom! Don\’t call me \’Amy Rose!\’ Just use one name! you
are so embarrassing!!\”)
Yes, I am in for it in a few years. 


Uncategorized

Refurbishing a filing cabinet

Note the old school cabinet on the left. 

Remember that taupey, greyish filing cabinet in the previous photos? Well, it is no more! Using the power of Pinterest, the suggestions of friends, and some trial and error, the filing cabinet has been made new!

After my co-worker Lindsay mentioned what a blast it had been to \”make\” a chalkboard for a patio party out of an old piece of wood, I asked her how she did it. \”Well,\” said she, \”Rust-Oleum chalkboard paint, of course!\” After staring at my bland filing cabinet for two years, her remark sparked a sleeping curiosity to life that had been deep within me. I wondered if the paint would work on metal? Lindsay didn\’t know. I had not originally planned to fix the filing cabinet — I didn\’t know it could be done. Now, I just had to know if it could. I went home and searched the internet high and low, finding a very helpful blog post here. I hit Home Depot and then Craft Warehouse (eventually) to find some different paints for my project.

My husband and son took the filing cabinet to the back patio in parts — drawers, then body. It was unwieldy and it made those weird, denting-like noises that only metal filing cabinets can make, as it popped and jostled its way from the second floor craft room, down the stairs and out the back patio door. We put it on a painting drop-cloth out there. It was a pretty warm day and I was hoping the sun would help hasten the painting. It was the end of my remodel week! Time was short; it was Saturday and work was Monday.

At first, the sun was great. I could see really well for sanding. I roughed up the entire outer surface with finer grit sandpaper to help the paint stick and I sanded off some interior rust on the lower portion of the cabinet. Of course it was in the hardest place to reach — the back interior wall behind the lowest drawer.  After climbing back out of the cabinet, I used a rag and my own breath to wipe and blow off the dust from the whole thing.

I applied the chalkboard paint with a roller, not a spray. This seemed to be the most economical way as the spray paint was more $$ per ounce. My friend Lindsay had used spray, but the woman in the blog post I was using also used a roller and it looked great. I sort of felt like I was taking a chance.

The sun dried the paint a little too fast — or so I thought — and the roller marks seemed to be showing, though in the end, they did not. The fear of failure just caused me to put on 4 coats of paint. If I did this again, I\’d do it in the garage. It took about a day for the cabinet to dry outside completely, too, with all those coats of paint. So weather also is a consideration; the possibility of rain would be an absolute NO!

I hated this. It looked like a hornet.

This is all AFTER I fixed the paint leakage. Took forever. Years ago, I
stopped taping my ceilings. Time to add filing cabinets to the list.

Once the main part was dry, I first painted on a yellow trim color. That was my plan: make it look like the pink one in the blog post, but make mine a vibrant yellow. I used painter\’s tape to get a straight line, but guess what? NO. It was a mess. I had to go back and do the whole trim over by hand. This included using the chalkboard paint to recover the black areas. This, I did all indoors, by the way.

I poked holes in a box, then screwed the hardware down for painting.
This saved on fingerprints — and annoyance.

Once that emergency was averted, I tried out painting the hardware. I learned that without sealer, you will fail in painting tiny metal parts. (I do like my method for securing the hardware to a box to paint. This made is ultimately easy to spray with the sealer I did eventually purchase at Craft Warehouse. See pics in this post) I also decided I hated the yellow metal. I went back to the store and got orange. And I had some pink laying around. And some sponges. My yellow-themed idea was saved.

Secure for painting, but I wasn\’t loving the color. 

Switching to orange was a good choice. For the little metal frames,
I just pressed them into the box for stability, as they have no
screws. These are pictured before the sealer. After that, they
are shiny, which looks MUCH better!

Amy Rose and I poked little dots in two sizes all over the cabinet. This was pretty fun. I just tipped my sponges to get the ones on the edges to look like half circles. There were a few spots that I touched up with tiny paint brushes — also had those lying around.

Purchased at Craft Warehouse: Sealer and
craft paint. The craft paint tends to be
around $1.

:Little sponges I had from painting Amy\’s room long ago. 

The most fun part of the project.

I had to use tape for the little sliding openers on the drawers, but I used a tiny
brush for safety!

Now I have a cute cabinet that the kids write all over in chalk. Oh — BE SURE to WAIT on the chalk! Follow the instructions to wait a few days for the curing of the chalkboard paint. It was hard to wait, but totally worth not having one more mess to fix!

The white swipes you see on the drawers went away after curing and
wiping the whole thing down with a damp cloth, per the directions.
These are hand marks from carrying and moving the cabinet around.

I got the little pink trash bin from IKEA to put rolls of paper and
large rulers in.

While the little painting mishaps put my project well into the evening of Sunday, causing me to lose that as a \”day of rest\” after the weeks\’ remodel, I think it was worth it. I have only the curtains to sew and some furniture to buy. The chair ideas can be found on my pinterest site, and the curtain fabric is here, along with a NEW IRON. Never thought it mattered so much. (Look at that old crappy thing on the right!) And it wasn\’t too bad: $39.99 Rowenta 1600 watts on Amazon. Who knew?

New iron to the left, and retro-sewing-themed curtain fabric on the right. Why is it taking me so long to make those curtains?! I guess I was waiting to get back on the blog! 🙂
For a step stool? Love these. Everyone\’s grandma had one in the kitchen.

Eventually want to buy this little guy to replace my rocking chair. Or not. Still thinking!
I DO have a grandbaby now, after all.
Uncategorized

Where\'s that Wedding Dress?

Jo and Andrew on their wedding day.
Jo is wearing her  lovely Nordstrom dress and the
antique necklace, given to her by
Andrew\’s grandmother

Some of you may be wondering: What the heck are these posts about a craft room remodel? I thought you were making your daughter a wedding dress? Remember? Knitting it? Last year?!

Well, in the words of Miss Elizabeth Bennet, \”Things took a little turn….\” and while Jo and Andrew still did get married (unlike Lizzie and Mr. Collins), there was little — a very little — extra something that came up early on in the wedding discussions.

Jo and I went back and forth on the wedding dress. She declared that her figure was changing every day and she didn\’t think she\’d be able to wear the knitted dress. I found another dress pattern — one that could be sewn instead of knitted — for the sake of speed, and the style even had a charming history of being made famous by Josephine Bonaparte during the Regency Era, which was, of course, Jane Austen\’s time. Rumor has it that Empress Bonaparte created the empire waist style to hide a pregnant figure; and it became all the rage.

The pattern! I may make myself one of these!

Jo does want me to knit the rest of the dress. She and Andrew are planning a future renewal ceremony and she says she will wear it then.

In the meantime — and for practicality — Jo purchased a dress at Nordstrom (actually two dresses, in case the first one didn\’t fit by the wedding, then the second one would stand in!). In the picture above, she is also wearing an antique necklace that belongs to Andrew\’s grandmother. (And isn\’t Andrew handsome?)

They are now cozily situated in their first home in the Seattle, Washington area and loving being parents! And I am loving being a grandma. Who can argue with this little face?

Baby Ethan is sporting a
Gabrielle Danskknit design, test knitted by me,
just for him.

Uncategorized

Tiny Pails!

Now, many months later!

These pails on the the craft room wall were a Pinterest find (You can find my own Craft Room Remodel board here). In fact, I will be posting my projects to Pinterest when I am done with these DIY posts, just to add to the plethora of similar projects already posted there. 

For the pails, I used \”50 Clever Craft Room Organizatoin Ideas,\” found on the DIYJOY website, found on Pinterest. It turned out to be a jumping off point, really. On one of our multiple trips to IKEA (As many of you are painfully aware, you are obligated to make multiple trips when you are building a lot of IKEA furniture, whether you want to or not; turns out there are often missing parts in the furniture kits. IKEA even has a department for missing parts!! I think it\’s a ploy to get you back — and back — into the store!) we noticed the SOCKER \”plantpots\” for .99.  These were a lot like the pails I had seen on the DIYJOY site and thought these were a steal! We then set out to find a rail and something to hang the pails on, so they could be filled with adorable crafty items! 
After spending quite a bit already, we were feeling pretty cheap at that point in our week-long craft room remodel. Some of the rails and hook systems, when added up, were a bit much, we thought. We walked around more and wandered into the kitchen section where there are a lot of little things in bins, maybe not even on the website, as is the case with our rail. I cannot find it on IKEA\’s site, but they were only $2.50/rail. Not kidding! So, we purchased 2 rails, a package of S-hooks (again, these were kitchen area finds and not found on the site! They were $2.50 for a set of 10!) and 8 SOCKER plant pots at .99/pail for a grand total of $15.42. I thought that was a pretty good deal. 
It pays to wander around. 
I still didn\’t have a way to hang my pots onto the S-hooks. I thought about drilling a hole in each pot, but then decided against that. I don\’t have the right tools for the job. Instead, I chose to use some scrap yarns in bright colors to wrap the tops of each pail. Can\’t lose, I figured! If it doesn\’t work, I can go back to IKEA and buy the specialized hook things for the pots, like these or these! My yarn wraps are secured with a simple knot. Then, I inserted an S-hook into one strand of the yarn, pulling it out a bit. It was a little tricky to make sure they looked even on the rails, but I like how they turned out. 

Scrap yarn and pails

Putting S-hooks into a single strand of yarn
Find stuff to put in your pots!

We realized after hanging these that the pails were right on the freshly painted wall! In order to keep the pails from scratching my new paint, I cut out little wedges from some of the felt circles that came with the IKEA furniture (we didn\’t need them as we put all the furniture on carpet) and stuck them to the bottom edge of the pails.

And there you go! Hanging pails — with no plants in them! I love these little guys so much that I bought 7 extra ones to organize tiny things when making projects! I keep my swatches in them. They double as coasters for hot coffee mugs in the craft room!
A friend of mine picked up these old spindles from Pendleton Woolen Mills in Milwaukie, Oregon as a suprise! I love
their antique feel! And the painting on wood was done by my daughter, Annie, who took an art class last summer from our
good friends Curtis and Michelle. Curtis\’ own art can be seen here and here! If you are local, check him out in
Portland, Oregon!


Uncategorized

A Room of my Own: Furniture

After all the coats of paint were dry–including all the Q-tip dots I made with white paint all over the ceiling to cover the red splatters–it was time to build some furniture. Months earlier–when we were working all this out–I purchased a large, adjustable, white craft table at IKEA and I really liked it. So we were planning to match everything to that. Plus, I loved the clean lines and the white energy against the brightly-colored walls of the room. Something about white in a craft room always makes me happy!

These shelves were our best fit — and price. We used a 4-unit bookcase stacked on an 8-unit one. Fit just right. And it left enough room between bookcase and ceiling to store little photo boxes on the top. We also took the time to secure these to the walls, of course! The finished product is about 8ft/2.4meters high. With this set, I was able to store my fabric, books and binders easily…until I buy more books, that is. And yes, I got sucked into buying those little black folding chairs, too. They are so cute!

The table was called GALANT  but now has another name. I had it for two years before we even did the rest of the room — how time flies. I love the corner workstation and desk! I had to watch out for the left/right thing on the desk. Got a little confusing.

My hubby and I headed to IKEA to get the furniture we had planned for 2 years earlier: a corner desk for the computer, a sewing table/desk, and some book cases for one wall. For the bookcases, we went with the KALLAX series. (Why does IKEA do everything in ALL CAPS? It always  feels like they are shouting at you, even from the freeway as you see their sign!)

In case you are thinking of bookcases for craft storage, consider this: a while back, we found a huge set of the BILLY series on Craig\’s List (for pretty cheap!), and thought we had struck gold. That is, until we looked at the dimensions. Be careful that your bookcases are deep enough to actually hold books, binders and craft supplies, or anything else you plan to store. Do you want to fold fabrics on the shelves? Stack boxes?  Measure your stuff! I was surprised by how deep my books were compared to the bookcases.

The little ALEX chest of drawers can be found here. It turned out hold a lot of notions, trims and extra crafting supplies. I even have a knitting drawer in it! As you see, a lot still needed to be done. 

The BILLY series is only 11\”/28cm deep, which was not going to be enough room for my supplies, at least not comfortably. A little shopping early on revealed that KALLAX was going to be the best price for us, as well as 15 3/8\”/38cm deep, with plenty of storage room.

A little more measuring of the room helped us pick up a corner desk, the MICKE corner workstation and the desk, which has a hole in the center–probably for a computer, but I put my sewing machine cord in there.

I know this is sounding like a commercial for IKEA, but it was so easy to make everything fit! Plus, we made a day of shopping! There\’s a Starbucks nearby at Cascade Station. This was made more exciting by the fact that we spotted Trailblazer Lebron James — though we had no nerve to approach him!

Why are we looking at couches?! It must be the IKEA trap.

The one! I was trying to save some $$ and so did not buy the drawers, but it also worked out as they would have been
useless to me. It paid to be patient!

The table, now called BEKANT! What th-?! Does it even matter?! What ARE these names?

Mommy, Daddy…I really need a desk. Yes, she got it. Sigh….and no,
she does not do homework there.