Blog Posts

Where’s all that yarn?

My yarn stash. The closet is in the back. Yes, it all fits in there.
Almost.

 You may be wondering about my yarn stash. When I remodeled the craft room, I didn\’t mention yarn storage. Maybe you aren\’t wondering about it, but in the event that you are, rest assured that it is all in the craft room.

Part of the point of the craft room was that my stuff was sort of stored all over the house (sound familiar to anyone?). I had fabric in the linen closet, yarn in my clothes closet, yarn in the makeshift craft room (at the time) and yarn in baskets — just everywhere. It needed to be consolidated into one location, where it could be accessed easily, and seen, too. No one wants to have to dig through their entire stash of crafting supplies to find a single skein of yarn or a pair of scissors. Enter Ravelry\’s stash storage page!

Ravelry is such an awesome website — and web community — for so many reasons! Indexing one\’s yarn is only one of them, but it is one of my favorites. When my craft room was done, I went through my entire yarn stash (Well, almost all…I left out 2 Rubbermaid totes of acrylic yarn that I use for prayer shawls/slippers for Christmas. I know which bins they are and the contents pretty much stay the same.) and catalogued every single item.

This took a separate weekend, and I used the time during some recent snow to do it. It was a total of about three days. I photographed all the yarn in groups (unless I already had it in the stash, then, in some cases, I left the original photograph), I recorded how much I have and for a lot of the entries I also included my intentions for the yarn.

It was a great exercise to be reminded of why I bought certain things, and to be reminded of projects I wanted to make. In almost every case, I still want to make the projects. Now that I have a lot more experience with knitting, I feel more ready. I used to spend a lot of time fretting over if I \”ruined\” a project, but I had spent all that money on yarn! Oh, no!! (I\’m over it — mostly) It would also be fun to complete old project ideas to feel like I did it and for the nostalgia of remembering how wide-eyed I was then about knitting. Nothing wrong with recapturing the magic!

When you record your entire stash on Ravelry — and use it correctly afterward — you will enjoy a lot of other benefits besides rekindling your original yarn-knitter relationship.

Ravelry Yarn Stash Benefits

  • Ravelry will help you keep track of your stash yardage when you draw from the stash for each new project. To do this, create a new project page and say you are using \”stash yarn.\” There is a button for this midway down the project pages under \”Yarns.\” Didn\’t do it originally? Not too late. Go back to any project page and put it in there! It will ask you how much you used. This takes a little effort on the part of the knitter, but I think it is well worth it. If you do this, you will only ever need to touch the stash page to add new yarns. 
  • Having a complete stash record is great, too, when you look at patterns. Pull up a new pattern you are considering and the pattern page will automatically tell you what ideas for yarn you already have. You\’ll quickly know if you need to head to the store, or if you can pull from your stash. Knitter\’s choice to ignore this one and head to the yarn shop anyway. 
  • Do you have a hard copy pattern in your hands and need yarn for it? You have a couple of choices. If you look up the specific pattern on Ravelry, you could look for yarn that way. Or, you can go to your stash and filter it using the little drop down menus at the top of the page. One says \”sort by name\” (of yarn) and one says \”filter your stash…\” . Both of these contain all manner of filters for use when you are looking for yarn. 
  • One drawback: I noticed that when I filtered my yarn for weight recently, it did not include all the yarns I thought it would. For example, I wanted a bulky weight yarn that would get me 3.5 stitches per inch, that\’s pretty specific. But I started with a \”bulky\” filter. It left out Lamb\’s Pride, which was one I had in mind. Turn out the filter considers Lamb\’s Pride Bulky to actually be a super bulky yarn. I just fixed this by adding a couple of more weights to my search, like aran and super bulky. No system is perfect, and, in the end, you still have to swatch and really see what works in real life. 
  • Finally, it is just fun sometimes to peruse your stash and see what you have, what you might need. Or what might jog your memory: Oh, yeah! I forgot I had that! This is a little easier than digging through multiple boxes and baskets, searching for yarn. Though on a rainy day, that is a fun activity. 
My yarn is in the closet in the craft room and there is a bit of overflow in the room itself, with 2 towers of Rubbermaid bins against the wall, next to the bookcase. I personally keep all my yarn in clear Rubbermaid bins (bugs hate the sunlight, I hear) and this time going through my stash , I also packed my wool into ziplock bags, some in groups, and some individually. We don\’t have a huge bug problem here in the Northwest, but there are those carpet beetles. I hate them like no other! 
I rotate my wool-containing bins in and out of the closet, so they all get some sunlight time, but not too much so as not to fade the yarn. To further deter the insects, I put little bags of crushed, freshly dried lavender on the walls behind my yarn bins, and I keep little cedar blocks at the bottoms of my yarn baskets. I haven\’t had a bug eat my yarn since I did all these things. (To be fair, bugs have only eaten my yarn once: It happened to some sock yarn that was sitting in a basket that was sitting wayyyyy too long on a wool rug by a frequently opened window. That incident was enough to cause an overreaction on my part! Protect those yarn investments!!)
A lovely time to stay indoors and count yarn! This is the view from my upstairs craft room window. We look over the
street, as from the \”top.\” All the forced-air furnace steam makes me think of the rooftops of London. I know. It\’s a
stretch.
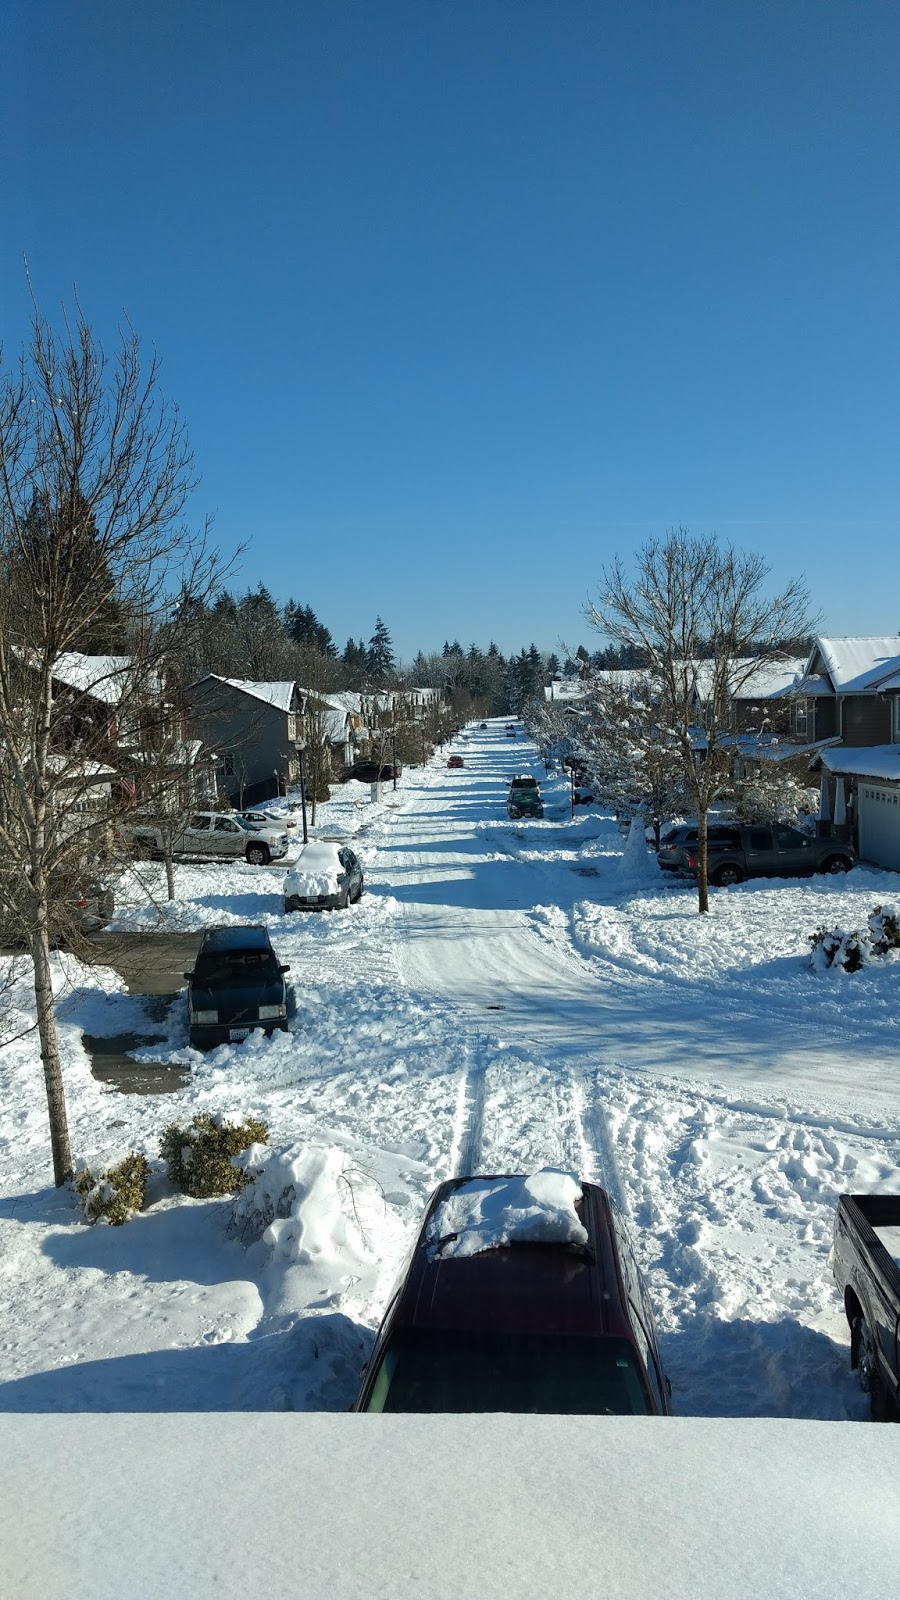
The snow was so lovely…
Until it wasn\’t. Dang rain!!
Blog Posts

Crazy Knittin’ Grandma!

What do you do when you have your first grandchild? You knit loads of stuff, of course. I admit, I did not take as many photos as I should have of the little guy Ethan in all his new duds, but I have some samplings!

First up: In the birthing \”suite,\” my daughter Jolene, my son-in-law Andrew and I snuggled in for a very long time together, waiting for the arrival of baby Ethan. Jo in the bed eating ice chips, and Andrew and I ordering occasional room service from the hospital kitchen and eating it in front of Jolene. For 20 hours. (Eating in front of the laboring mom may be considered rude, but I figured it was my turn; this was my first experience not being the mom in the bed. And wow it was awesome!)

Between the eating and non-eating of food, Jo and I knitted the hours away, while my son-in-law

fidgeted and paced the room, periodically asking if Jo was okay. (This amusingly reminded me a bit of Colonel Brandon, in Sense & Sensibility. Without the danger part, of course. )

The knitting was productive as we had such a long time to produce. I made the baby a new little to-go hat and started some tube-sock style knee highs for his little legs; in the event that he may want to play some basketball later. Babies are, after all, cooped up for some time in utero and you never know. 😉

Second order(s) of business for the knitting grandma: I had left behind a blanket at home that I had started a couple months before. The baby was coming about 4 weeks early and the blanket wasn\’t ready. It was a pattern I had been saving for 8 years — since about the first month or two I began knitting. Jolene was still in college back then, no babies on the horizon, but I came across the pattern at the Knitting Bee Yarn Shop in Beaverton, Oregon and I just had to have it. The pattern was too complicated for me at the time, of course, but it embodied the spirit of my home state of Oregon; and more importantly, it embodied the spirit of my hippy dippy daughter.

Delivery room hat! Matching socks not pictured!

The blanket pattern was knit in one piece but looked quilt-square style, with alternating evergreen trees and raised peace signs. These were celtic knots, but I didn\’t know that at the time. Looking back, this made the pattern even more meaningful, given my Scottish, MacLean heritage. The name of the pattern is Peace, Love and PDX and it is actually free!

I purchased some Cascade 220 in a color called \”Shire,\” making the whole thing even more charming to all of us. Once I knitted the main part of the blanket, I added the called-for i-cord in a contrasting orange color, as Halloween is Jolene\’s favorite holiday. Then, I felt it needed a backing. Like flannel. But how? TECHknitter to the rescue! This woman\’s website is so chock full of good information — it truly is astonishing. Her help in adding a flannel backing was key to my final success!

The flannel took about 3 hours to whipstitch on with a tiny sewing needle, using orange thread on orange fabric, but it was so worth it. I think I may want to line a hat next! I was able to give it to baby Ethan pretty quickly after he got home, which was great!

I knitted the baby a lamb hat by Gabrielle Danskknit and then a jolly roger-motif hat with some mittens.

On the blocks, drying and stretching out.
The flannel backing made the piece feel much more substantial. 
There be pirates here!
Blog Posts · Home Crafts

Bonus Post! A Room of my Own: The Bulletin Board

Jewelry making supplies from
my daughter\’s mother-in-law

In the interest of catching up, I have decided to try and finish up the posts on the craft room remodel this week. So here is an extra post! I hope you all don\’t mind!

I have a lot of weird things given to me — sewing notions, old yarn, old pieces of upholstery fabric. Once, I even received an offer to take a partially made afghan. The woman\’s sister had died and she didn\’t know what to do with it. She thought maybe I could finish it? She produced some painfully old and dusty crocheted strips (Incidentally, they were very nice work) in purple and green. My crochet skills are not to that level, I was able to say, plus I didn\’t have the heart to tell her that an afghan takes an incredible amount of time to complete!

Grandma Miller\’s buttons, along with
some thread given to me recently!

While I did not take the afghan project, the truth is that most of the time, I do not refuse items such as these. You never know what you might do with them. The possibilities seem endless. Plus, I grew up with an old Finnish farmer for a father who lived through the Great Depression. He does not throw ANYTHING away. That man has old boards — older than me — on his covered patio that he refuses to get rid of. And there is so much more: old nails, pails, bricks, nails stuck in wood, garden spikes, old tomato cages and anything else he is secretly holding.

Oh, and let\’s not forget the circa 1960\’s water skiing boat on the side of his house neatly stored on a poured concrete pad. It has been outside, on a trailer and with no cover — all of my life. Once he had a wife, then kids, the skiing went out the window. Apparently this was too frivolous for a serious baptist family. He is now 85 and the boat is a lost cause, which he will not give up on. No intentions of restoration, either. \”Someone will pay a lot of money for that boat!\” He says. Then I say, \”Yes, me. To have is hauled away.\” I say this only to myself.

But I digress…

My father keeps everything. He is a keeper, not a hoarder. I think some of this rubbed off on me.

I am pretty sure my dad\’s boat would look like
this if it had been cared for.

At work recently, a patient brought me 2 huge old tins of sewing notions left to her by a great aunt who had recently passed: pins, hat pins (some rusty with tetanus), trimmings and buttons. Oh! How I love old buttons! Some were strange and some were lovely and antiquated, some were antiquated, but useless due to damage. All were slightly scratched or tarnished by rubbing against each other for years in those tins. And when you washed them, a curious green film came off onto your hands. I hope it was from tarnished copper buttons living in the tins with the other buttons…

I happen to also have some button tins of my own, left to me by my grandmother, Grandma Susanna Miller, who died at 92 years of age when I was 25. That was in 1995. I usually don\’t even dare to think of using my buttons for fear that once I do, they will be gone forever. I generally can\’t bear the thought. It\’s like losing her all over again.

So they stay in their tins–without mysterious green residue.

After looking and looking, and handling and examining the buttons from my patient–and washing my hands with Boraxo–I had an idea. The old, crappy corkboard I had in the closet could be made over. I was keeping this for a few years after Alex left home and moved to Bend. Like my father, I thought I could use it.

Note the fabulolus art work on the cork. It was just too big and, I believed, too useful to throw away!

The cork seemed a little dry, if that is possible, and there was kid writing all over the board. I popped over to the fabric store, got a little piece of clearance fabric with a sewing theme. I had a little bit of batting. To the two old tins from my patient, I added some old broken jewelry I had, along with some old jewelry and beads given to me by my daughter\’s mother-in-law, and yes, a few of my grandmother\’s buttons.

This made a fun assortment of things that resembled a scene from an Eye Spy book.

I pulled out some very old bias tape from my grandma\’s stash (I have a lot of her stuff–I was the only granddaughter and loved to sew with her!) and whipped out some paper from a roll I originally bought (from IKEA, yes, my shame is great….) for the kids to draw on. Now, it was for a little pattern drafting.

I measured the stinky teenage boy bulletin board, just the cork part. Then, I used a cutting wheel to cut out a piece of batting. I drew a rectangle on the paper, with a small seam allowance for the fabric. I thought it would be a nicer finish if I hemmed it and I added the biased tape to the hem for stability.

A roll of IKEA paper and some clearance fabric from JoAnn\’s
You quilters have some very awesome tools!! I had to have a couple–and I use them all the time!
A perfect cut from the scary sharp cutting wheel!
Grandma\’s bias tape. I won\’t even venture a guess on how old this is.
So much to put on such a big frame!! Get the hot glue!
The large, yellow button on the lower right corner is beyond repair or use for a garment, but it sure is cool!
The scotty dog was my favorite brooch as a child. I used to wear it on my coat. His back broke off long ago, but I couldn\’t bear to part with him.
All done! I feel like there should be a list of things to find on this thing!
Can you find:
20 wood spools, a metallic dog, a broken key chain and a little green frog (at least, I think there’s a frog). 100 white buttons, a silver web, an old belt buckle and 5 spools with old thread.

I had not really planned out how I was going to secure my cover for the ugly bulletin board, so I thought about how cute upholstery pins are. I went to the local hardware store and found some odd yellow thumbtacks. They matched my fabric, why not? So I brought those home and pinned them all around the board, securing it to the corkboard. It didn\’t look quite right, so I measured out little boxes with a clear quilting ruler ( I don\’t quilt, but I love their useful supplies!) and put the yellow tack on the board, \”quilting\” it.

Then, came the hot glue; tons and tons of hot glue. I enlisted my patient daughter, Annie, who is a student at the Vancouver School of Arts and Academics (VSAA) to help with placing and gluing all the tiny items onto the frame of the bulletin board. She has a good eye for composition!

This part took quite a while. I even had to buy a new hot glue gun–plus a lot more glue sticks. Mine had never seen so much action in all its years with me combined and it got so sticky that it became unusable.

When it was done, it looked more like a walk down memory lane — my memories plus the memories of others. It doesn\’t totally match my craft room concept, and maybe someday I\’ll pass this project to my daughter Jo, who longs for a room of her own and make a bulletin board that more matches my 50\’s kitchen concept. Or maybe I\’ll change the fabric and add more red to the frame — there is room.

But for now, I really enjoy looking at the new bulletin board and taking a little walk down the lane of memories.

Before
After!

Next, we’ll talk about those little pails on the walls–yes, they are from IKEA.